Showing posts with label terrain. Show all posts

Wednesday, June 28, 2023

Dice tower/terrain piece

After about two years of watching Youtube crafting videos, I decided to try my hand at making a structure from scratch. I constructed this dice tower from a breadcrumbs can and dollar-store foam board. 
I cut off the top and bottom, then cut three slits at 45° angles to bounce the dice and cut an opening at the bottom. The wood planks surrounding that doorway are just craft (popsicle) sticks. For the stones, I used scissors to cut dollar-store foam board into irregularly sized and shapes stone blocks. Then I took those foam pieces and shook them in a can with real rocks to add texture. 
After gluing on all the foam bricks, I painted it with Black Magic Craft's suggested mix of black paint and Mod Podge to strengthen the build and to protect the foam from the solvents in spray paints. I then sprayed it with a matte black. 
I painted the stonework with overbrushes and then drybrushes of successively ligher shades of gray. Once that was done, I gave the whole thing a black wash, and then I picked out a few stones to hit with some shades I had--green, blue, and brown.
Details included some flocking mixed with white glue to simulate moss, and some store-bought trees and tufts and a treasure chest mini to close off the dice corral. Then an overall spray of matte varnish, and it was done!
The dice corral is a little small, making it difficult to remove more than three dice, but it does its job and I am happy how it turned out.
As you can probably tell, a certain videogame was a major influence for this build.  I plan to use it with Oathmark and other fantasy wargames, but this isn't my last piece of terrain.

Saturday, December 18, 2021

In the early days of Christmas ...


My true love gave to me some hobby-related gifts: brushes, glue, and this nifty set of Abandoned Factory scatter terrain from Mantic. I'm very lucky to have such a thoughtful and considerate spouse who supports my gaming hobby. 

Tuesday, November 30, 2021

Another piece of junk

Here's another quick and dirty terrain piece for Stargrave and other 28mm sci fi games. This one came from a Girl Scout candy box (dark chocolate caramel cups with sea salt, if you're interested).
The usual steps to give it a worn, yet not grimdark, look: 1. Spray paint a single color. 2. Heavily drybrush silver. 3. Apply a black wash. 
Not perfect, but good enough to provide a little cover during a battle without looking out of place. And one less thing in the recycling bin.

Friday, November 5, 2021

More scatter terrain

As MillenniumCon approaches, here is some more scatter terrain from last summer. 

Can you guess what this transmitter came from?
These two pieces were from my wife's contact lens containers. What's everyone else working on?

Sunday, October 31, 2021

Alien statue

This piece of scatter terrain was simple to make: a dollar-store action figure (Final Faction) glued atop a pill bottlecap. 
Painting was also straightforward: black primer and a couple of shades of purple heavily drybrushed, including some color-shifting purple to give it an otherworldly glow that's even more apparent in person.
It's a tall piece of scenery for D&D, Stargrave, Frostgrave, Song of Blades and Heroes, or pretty much any 28mm sci-fi or fantasy game.

Wednesday, October 20, 2021

Trashy town tutorial

My trashy buildings were easy to make, and other than waiting on paint to dry, didn't take very long to finish. And other than the cost of paint and glue, which I already had, it didn't cost me a cent. For those who are interested, I have some step-by-step photos of each building and a little commentary after the jump:

Monday, October 18, 2021

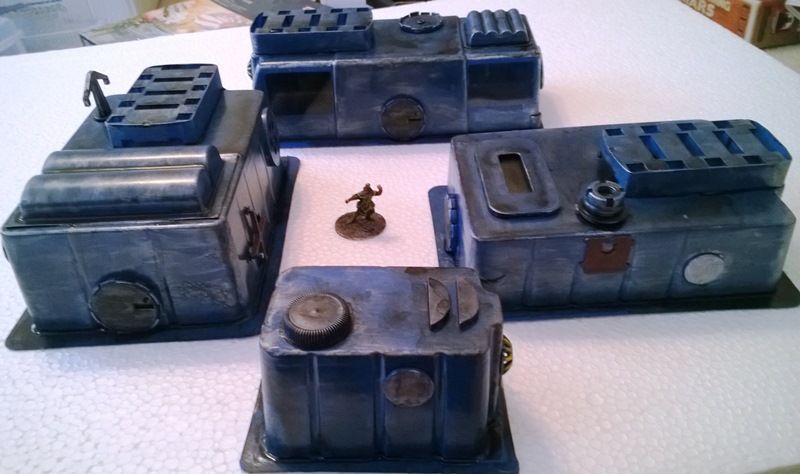
Some trashy buildings

Just like I did for some scatter terrain this summer, I created some buildings for Stargrave and other 28mm-scale skirmish games using trash and other bits bound for the landfill.
For the main structures, I used the plastic blister packaging from a couple of Starfinder spaceship sets, another large figure from WizKids, and a Q-tips box.
Just like with my previous terrain, I wanted bright colors instead of a grimdark look. 
And being a packrat who saves all sorts of interesting shapes from the recycling bin, I was able to put a decent amount of detail on these buildings.
While my gaming buddies all have plenty of sci-fi terrain, it's relaxing to put stuff like this together, and I enjoy flexing my creative muscles.
I can use these structures with the toy spaceship I repurposed for 28mm gaming as well.

I haven't had a chance to get these on the table for gaming yet, but I hope to do so in the near future.

Tuesday, July 27, 2021

Literally garbage

These are some quick-and-dirty terrain pieces made from household detritus that I had been hoarding like a packrat. Inspired by the crafting videos from Wyloch's Armory, but boiled down a bit, I made these by spraying the base color, gluing on greeblies, heavily drybrushing with silver, and then drowning in a black wash.
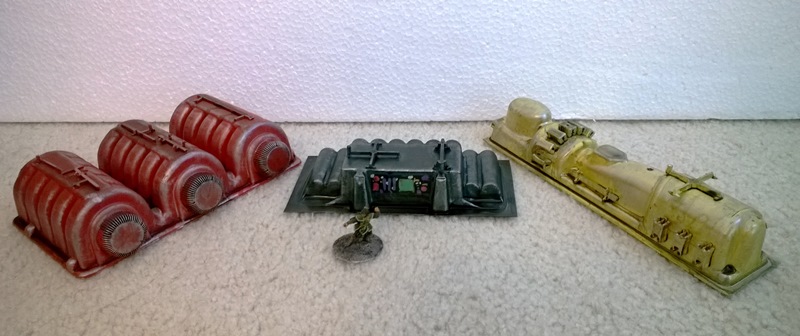
This first piece is what I like to think of as some kind of alien computer or scientific instrument. As you may have guessed, this is the plastic blister from a AA battery pack, with a couple of sprues from old Warhammer bases glued on top.
Next is a power generator made from the tray holding the cookies inside the box. You get bonus points if you recognized it as coming from Girl Scout cookies (unfortunately, I don't remember which kind). In addition to the plastic sprues on top, I glued water bottle caps to this side, and some unused bases that came with some WizKids unpainted miniatures to the other side.
Last is this device, maybe some sort of engine or other mechanical contraption, from the packaging that once held an electric toothbrush. Add some sprues and the plastic fasteners that come with cold cuts from my supermarket deli, and we have a nice piece of alien machinery.
While Wyloch and other crafters use browns, grays, and blacks for that grimdark aesthetic, I wanted my sci-fi terrain to be more colorful, like the fantastic images from my youth. The spray paints I used (Rustoleum Paint + Primer Satin) looked bright when first applied, but the weathering toned it down the right amount to make these pieces look like they belong together on the tabletop. Not bad for what started out as a bunch of junk!


Friday, July 9, 2021

Some ship worth fighting for (or over)

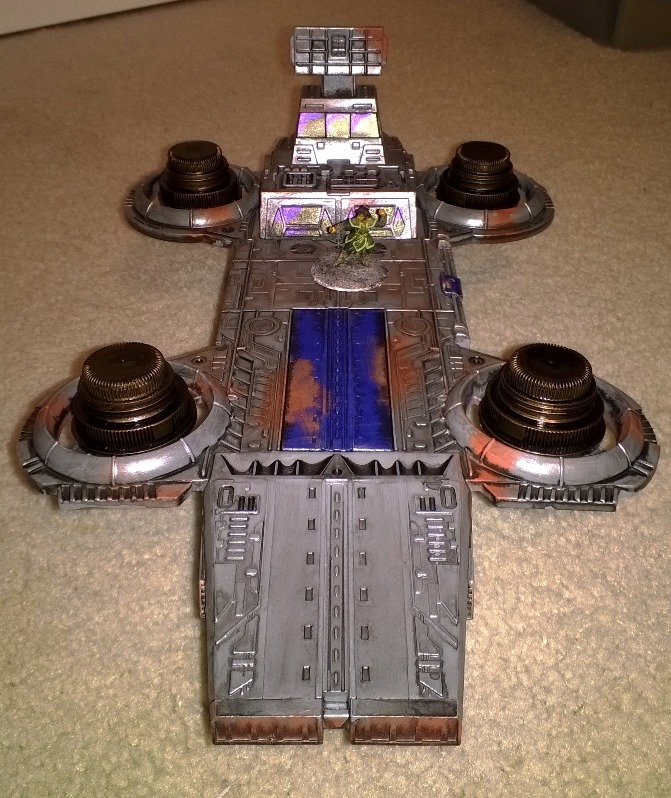
Remember the spaceships for my space war? I finished repainting and modding this one a couple of weeks ago after gaining some inspiration from watching crafting videos from Wyloch's Armory.
What was once a Space Union vessel is now the Kaye MacGuoyo, a short-distance sublight cargo hauler that is impractical for most spaceship gaming but very useable for a sci-fi skirmish, such as Stargrave.
Whether hiding behind or in it, figures can take advantage of this spaceship's port and stern hatches, along with a flat dorsal deck suitable for storing more cargo or for tactical use as combat positions.
The 'Uoyo lacks any FTL capability, such as a Bachman-Turner Overdrive, instead relying on its four Neerglaw pseudogravity caps to reach low orbit for in-system planetary hops.
(I originall had this ship outfitted with larger, more cumbersome éloD agrav units, but I prefer the sleeker look of the smaller engines.)
This was a pretty easy piece to make game-ready. I just unscrewed the top and bottom parts and spraypainted them (brown bottom, grey top), then drybrushed and washed (thanks again to Wyloch for inspiring me to get this finished). For the engines, I popped out the propellers from the nacelles, glued together these engines made from pill and tea plastic bottle caps, painted them metallic brown, and attached them.

I painted the windows will some color-shifting black paint, then some color-shifting white in the upper left corners. Some orange paint dabbed on for rust here and there, and now this piece is ready for us to fight over, fight for, or fight from.

Monday, June 14, 2021

"Space ships for your space war"

Browsing online for cheap toys to use in Stargrave, I came across the Space Union line of sci-fi sets, advertised as "Space ships for your space war." According to the packaging, this toy line is made by Peng Rong out of China. I found two items, once looking like a SHIELD helicarrier, and the other like a more conventional science fictional vessel.  

Each was under twenty bucks, and free shipping. I got a whole lot of toys for my $40. Not only were they large models, suitable for use in 28mm skirmish games, but each big ship carried several smaller toys, a mix of flying and ground vehicles. 

The set incuded a couple of scale-indeterminate winged craft that could do in a spaceship game, a tracked tank that might work in Ogre, and even a die-cast sedan. While the car is too small for 28mm, the construction-type hover vehicle and the four-legged walker (which will make a nice robot guardian) are the perfect size for Stargrave and other sci-fi games, like Mutants & Death Ray Guns.

These toys have a lot of potential in my scenarios as objective, opponents, opportunities, or even just scatter terrain. Unfortunately, the low price of these sets means the undersides of most of these vehicles are hollow, but that won't be an issue in most games. 

Still, it's a lot of bang for your gaming bucks. These spaceships just need some new paint jobs, and they'll be ready for use as terrain features or objectives. Their size means they will block line-of-sight and provide vantage points, which will make tactical situations interesting. All in all, I'm happy with my purchase.

Now I'm off to work on my space ships for my space war. 

Thursday, May 27, 2021

3D tiles for Terraforming Mars


So I got my Big Box expansion for Terraforming Mars recently, and it is certainly big. I had pledged for the small box, with just the 3D tiles, but instead they sent the Big Box, with the tiles, storage containers for various game tokens, and boxes for the cards, all designed to fit in the huge box that's big enough to hold all the expansions. Like I said, this expansion is large--more than twice as deep as the box for the original game. I have plenty of room for all the expansions I own (Prelude, Colonies, Venus Next, and the extra maps). 

The storage is pretty well thought out, and it's easy and quick to pack and unpack the game. The box with all the stuff is kinda heavy, though. And while the 3D terrain tiles don't affect game play, they certainly do enhance it. I like the way the greenery and city markers, as well as the special project tiles, look on the game board. I also got the transparent plastic domes as an add-on, because they look cool, too. 

This product also came with some promotional cards: 18 new projects and two new corporations. So I played some solo games, using each of the new corporations on each of the three maps (six games in all), and succeeded in terraforming Mars each time! It was fun to have this new terain out on the map, and I'm looking forward to playing this with live opponents once our group starts face-to-face gaming again.

Wednesday, April 28, 2021

Another bookcase

Some more scatter terrain as part of my quest to apply pigment to castings, this time a bookcase from the Reaper Bones line. I don't feel as guilty not doing a traditional human/humanoid figure, because I feel like I put nearly the same amount of work into this piece of furniture (what with painting all the individual books and all). 
Plenty of detailing on this casting, although I'm not a fan of the company name and copyright symbol on the back of the thing (which now that I think about, I could have sanded down). Paint, wash, and drybrush really brings out the wood grain.
Because the bottom of this piece isn't flat, even after some sanding, I glued a small section of actual wood to the model to keep it steady and upright. As you can see, it goes well with 28mm figures.
Another addition for my skirmish games (D&D, Frostgrave, Melee/Wizard, Song of Blades & Heroes, etc.). And as you can see, it's part of a matching set--although I painted this slightly different than the first one I did.
I'm very pleased with how this model came out, and I like it better than my initial version. But I want to ask people veiwing this blog, does it look like there is that much of a difference? Please let me know.